
Stone Veneer Repair: Why Pieces Loosen, Crack, or Bulge
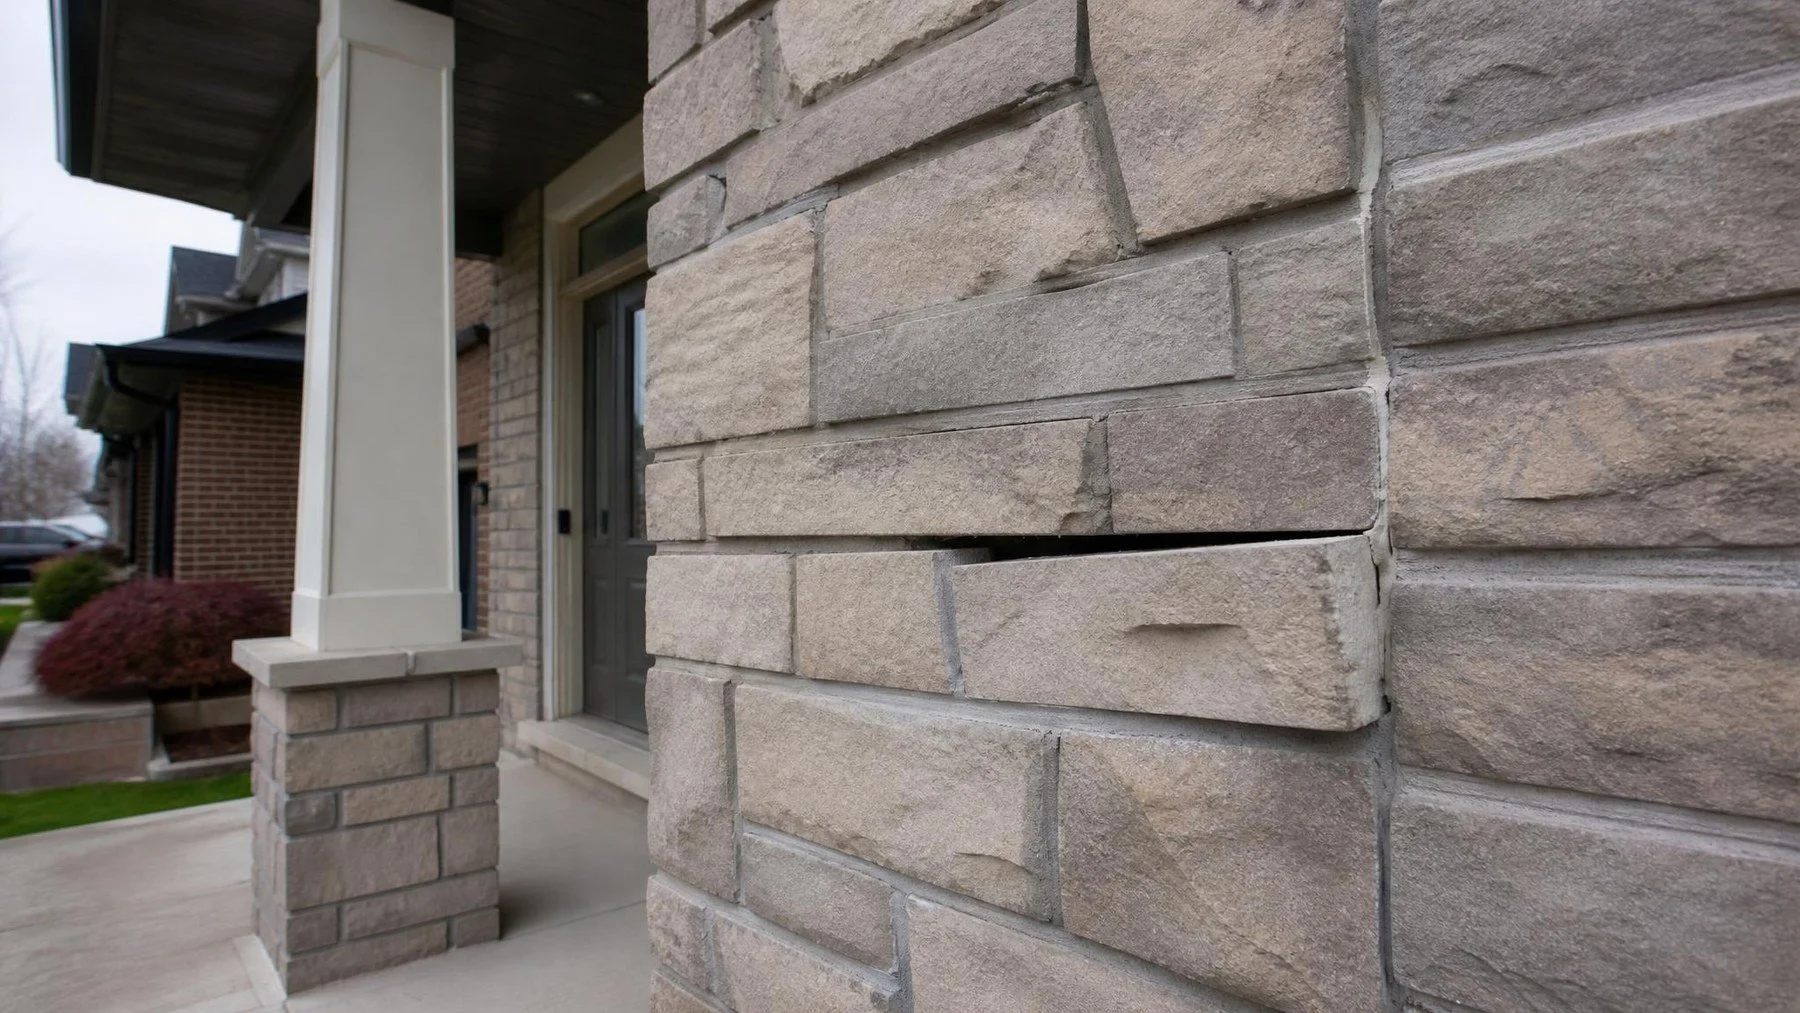
Stone veneer repair is a question about depth before it is a question about stone. Loose, cracked, or bulging veneer is a symptom, and the safe repair depends on whether the failure is at the joint, bond, drainage plane, support, or wall behind it. Those five layers sit within a few inches of each other and they fail for entirely different reasons.
This matters because veneer is a facing. It carries its own weight and sheds weather, but it is not holding the house up, and it relies on what is behind it to stay attached and to stay dry. When a piece comes away in your hand, the useful information is what the back of it looks like.
We take a piece off and look behind it before we propose anything, because refacing over a wet or failing substrate is the repair most likely to come back. Here is how the five failure modes present.
Failure at the Joint
The mildest case. The mortar between units has cracked, receded or fallen out, while every piece is still firmly attached and in plane.
How to confirm it
Press a unit beside the open joint. If it does not move, flex or sound hollow, and there is no staining or damp behind, the problem is the joint alone. Check whether the loss is general across an elevation or concentrated under one detail above, because concentrated loss means water is being delivered there.
What the work is
Cut back the failed mortar to sound material and replace it with a mix compatible with the units, finished to a profile that sheds water rather than holding it on a ledge. This is ordinary joint maintenance and belongs with stonework upkeep.
Failure of the Bond
Here the unit itself has let go while the wall behind it is sound and dry. Pieces come off cleanly, often with mortar attached to the back, or they rock in place.
What the back of the piece shows
- Clean stone with no mortar left on it, which suggests a poor bond from the start.
- Mortar stuck to the stone but released from the substrate, which points the other way.
- A smooth, dusty or painted substrate that was never going to hold adhesive mortar.
- Damp, dark mortar, which moves this into a water problem rather than a bond problem.
- Rust marks, which means a metal fixing is involved.
Why one piece matters
A single unit that let go after an impact is a local reset. Several units releasing across one area usually means the original installation condition applies to all of it, and the sensible scope covers the area rather than the individual pieces.
Failure at the Drainage Plane
This is the most common serious case and the most often missed. Water gets behind any veneer. The assembly behind it is supposed to drain and to dry, and when that path is blocked or was never completed, the water sits there.
Signs include damp or staining at the base of the veneer, efflorescence on the face, interior damp on the matching wall, loose units concentrated low on the elevation, and a bottom edge with no visible way for water to escape.
The repair here is not a masonry repair in isolation. It involves opening the assembly, correcting the flashing, drainage and edge details, and only then reinstating the veneer. Doing the stone first simply seals the problem in.
Failure of the Support
Veneer has to be held up and tied back. Where a shelf angle, lintel, support ledge or a set of ties has corroded or was never adequate, the veneer moves as a unit.
That is what a bulge actually is. A section pushing outward, a vertical crack opening at a corner, a sagging line above an opening, or a horizontal crack running along one level are all signs that something structural behind the facing has given way. Rust staining in a line across an elevation is often the clearest clue, because corroding steel expands and pushes the veneer off the wall.
Failure of the Wall Behind It
Finally, the veneer may be reporting a problem that has nothing to do with cladding. Settlement, foundation movement or a framing problem shows up on the most brittle surface first, and the veneer is the most brittle surface on the building.
| Symptom | Layer that has failed | Who defines the repair |
|---|---|---|
| Open joints, units tight and in plane | Joint | Mason, as planned maintenance |
| Pieces releasing, substrate sound and dry | Bond | Mason, area scope rather than piece by piece |
| Damp low on the wall, salts, interior stains | Drainage plane | Open the assembly before any refacing |
| Bulge, sag over an opening, rust in a line | Support or ties | Structural engineer writes the brief |
| Stepped cracking that continues past the veneer | Wall or foundation behind | Engineer, with the veneer repaired last |
What to Do Before Calling Anyone
- Keep any piece that has fallen and photograph both faces of it.
- Press gently along the area and note where units move or sound hollow.
- Photograph the bottom edge of the veneer and the ground condition at its base.
- Check the matching interior wall for damp, staining or peeling finishes.
- Mark and date the ends of any crack, then look again in a month.
- Keep people away from an area that is bulging, because veneer fails in sheets.
Where the work touches support elements or structure, permit questions arise and the City publishes guidance on when a building permit is needed. Localised unit and joint work sits with general masonry repair, and the same diagnostic logic applies to clay units on our brick repair page.
The Straight Answer on Failing Veneer
Find the layer, then fix that layer. An open joint is maintenance. Released pieces over a sound substrate are a reset. Damp behind the facing is an assembly repair that starts with flashing and drainage. A bulge or a sag is an engineering question. Cracking that carries on past the veneer is a building question. Reface before you know which one you have and you will pay for the stone twice.
Show Brick Aid Masonry the damage
We are a family owned masonry company serving Toronto and the GTA. We look behind the facing before we quote, give you an honest free quote, and back our work with a 2 year workmanship warranty. Request a free quote and send us photos of what you found.